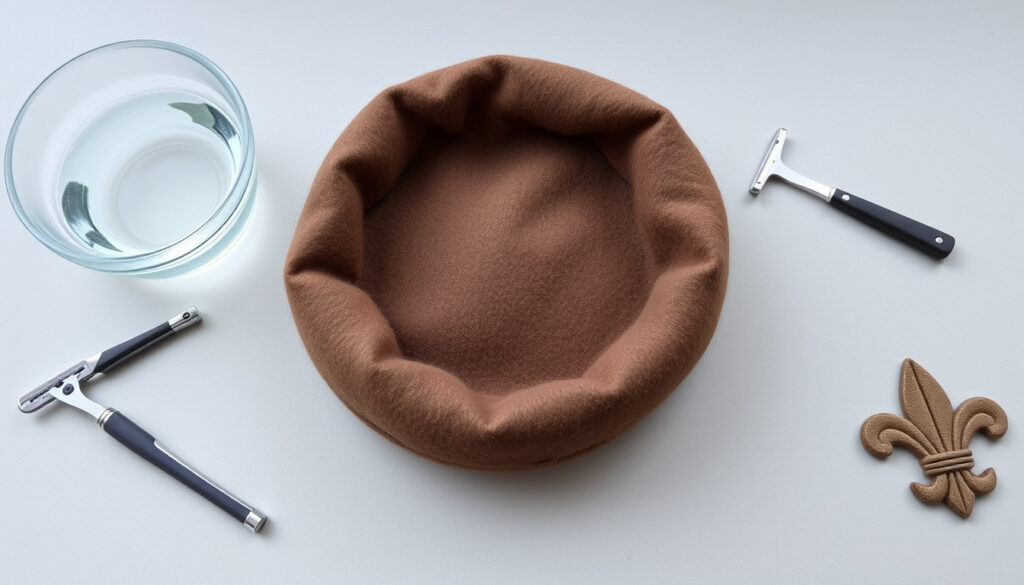
How to Season a Beret: Military, Scout & NPCC Methods
There’s a moment every new beret owner recognizes: you pull it out of the package, and it looks nothing like the crisp, shaped headgear you see on parade — flat, baggy, and shapeless, it needs work. The process of transforming it is called “seasoning,” and getting it right matters more than the material, whether you’re in NPCC, SAF, Scouts, or St John.
Standard soak time: 10-15 minutes ·
Water temperature for wool berets: Cold (room temperature) ·
Air drying time: 2-4 hours ·
Common beret materials: Wool, acrylic, cotton blends
Quick snapshot
- Dampen beret with lukewarm water (Military History HQ)
- Mold to fit your head snugly (Military History HQ)
- Secure shape with elastic bands or clips (Military History HQ)
- Submerge in cold water for 10-15 minutes (USS NPCC uniform guidance)
- Avoid hot water on synthetic materials (USS NPCC uniform guidance)
- Gently squeeze, do not wring (USS NPCC uniform guidance)
- Pat dry with towel (The NPCC Beret tutorial)
- Air dry away from direct heat (The NPCC Beret tutorial)
- Hairdryer on cool setting acceptable (The NPCC Beret tutorial)
- Crest above left eye (Westwood NPCC uniform etiquette)
- Fold excess material to the right (Westwood NPCC uniform etiquette)
- Adjust tilt for comfort and regulation (Westwood NPCC uniform etiquette)
Five key facts to know before you start seasoning your beret — the variables that affect every method.
| Fact | Detail |
|---|---|
| Standard soak time | 10-15 minutes |
| Water temperature | Cold (room temp) for wool |
| Drying method | Air dry, shape set |
| Common mistake | Wearing crest too low or off-center |
| Material preference by season | Wool in cold, cotton in warm |
How to quickly season a beret?
When you need a shaped beret fast — maybe inspection is tomorrow or you just got issued one — speed matters. The quick method trades some depth of set for convenience, but done right, it still produces a clean military-style shape.
Overnight seasoning method
- Dampen the beret with lukewarm water — avoid soaking the leather band (Military History HQ)
- Mold it to your head and pull excess material to the right toward the right ear
- Secure the shape with elastic bands or a tight headband
- Let it air dry overnight — 6-8 hours is sufficient for most wool blends
- Remove bands in the morning and check the set
The overnight method is the most common approach across NPCC units. According to the PCSS NPCC uniform maintenance guide, the key is to leave the folded beret under a weight until needed for training. Over time, the creases become more defined and the beret becomes seasoned. The trade-off: you get a decent shape in one night, but the crease may soften after a few wears.
Military-style quick shaping
- Wet hands with cold water — never soak the beret itself
- Rub the damp hands over the beret surface to moisten it evenly
- Put the beret on your head and shape it by hand, pulling fabric taut
- Wear it for 30-45 minutes until it starts to dry in place
- Repeat for 2-3 cycles if the shape isn’t holding
This method is used by SAF personnel and other uniformed groups who need a presentable beret on short notice. A Reddit user in r/NationalServiceSG describes the daily routine: Every day or 2 wear it and wet your hands, then use hands to shape it.
The advantage is that you never fully soak the beret, so there’s no drying wait. The catch: the shape is less permanent and requires more frequent touch-ups.
Scout and NPCC variations
- NPCC protocol: remove the beret and detach the crest before seasoning (The NPCC Beret)
- Scout method: shape the beret while damp, wear it briefly, then press it flat under books
- St John approach: wet the beret lightly, form it over a rounded object (like a bowl), and let it dry completely
According to the NPCC tutorial, the first step after training is to remove the beret before seasoning it. The tutorial emphasizes never to season the beret while the crest is still attached. The NPCC method also instructs users to wipe the inside of the beret with a damp towel to remove sweat and then allow it to dry sufficiently before shaping.
Quick methods work for inspections, but they produce a less durable crease. For NPCC cadets who wear the beret weekly, the overnight weight method yields a sharper, longer-lasting shape than the wet-hands touch-up routine.
Do I soak my beret in cold or hot water?
Water temperature is the single most common point of confusion in beret seasoning — and the one variable that can permanently ruin your beret if you get it wrong. The answer depends entirely on the material.
Cold water method for wool berets
- Cold water (room temperature, around 20°C) preserves the natural oils in wool
- Submerge the beret fully for 10-15 minutes (USS NPCC uniform guidance)
- Gently squeeze — do not wring or twist — to remove excess water
- Pat dry with a towel before shaping
Wool fibers are naturally resilient when handled with cold water. Hot water causes wool to felt — the scales on each fiber lock together, shrinking the fabric and stiffening it permanently. The Military History HQ guide specifically warns against wetting the leather band because it can shrink and distort the fit.
Hot water risks for synthetic blends
- Hot water (above 40°C) can shrink acrylic berets by up to 10%
- Polyester blends may lose their shape and become stiff
- Lukewarm water (30-35°C) is the maximum safe temperature for synthetics
- Never use boiling water or a kettle — this will deform most modern berets
The risk with hot water is not evenly distributed. Acrylic berets, common in fashion and some uniform contexts, are particularly vulnerable. The fibers relax in heat and then contract unevenly as they cool, creating a wrinkled, distorted shape that cannot be fixed. NPCC and SAF typically recommend cold water for their wool and wool-blend berets.
Water temperature recommendations by organization
- NPCC: cold water, room temperature — per Westwood NPCC uniform etiquette
- SAF: cold water, avoid leather band — per Military History HQ
- Scouts: lukewarm water for cotton blends, cold for wool
- St John: cold water for all materials, with extra caution on lining
The pattern across organizations is consistent: cold water is the default. The only exception is cotton or cotton-blend berets, which can tolerate lukewarm water because the fibers are less heat-sensitive. For wool and acrylic, cold water is the safe choice.
Cold water takes longer to saturate thicker wool berets, but it preserves the material. Hot water speeds up the soak but introduces permanent shrinkage risk. For NPCC cadets who need their beret to last through multiple training cycles, cold water is the only responsible choice.
How to make a beret dry faster?
Waiting for a soaked beret to dry is the most tedious part of seasoning. But rushing the drying process with high heat is the fastest way to ruin the shape you just created. The trick is to accelerate drying without damaging the fibers.
Using a hairdryer on low heat
- Set the hairdryer to cool or low heat mode — never high heat
- Hold the dryer 15-20 cm from the beret surface
- Move the dryer continuously to avoid hot spots
- Focus on the crease area and the folded edge
- Use for 5-10 minutes, then let the beret rest for 10 minutes
The NPCC Beret tutorial advises that ironing should only be done after the beret has been well seasoned. The same principle applies to hairdryers: low heat is acceptable for accelerating the final drying phase, but you should never use high heat on a wet beret — the combination of moisture and heat can cause uneven shrinkage, especially in wool blends.
Air drying with fan
- Place the shaped beret on a flat surface or a rounded form
- Position a desk fan or standing fan 1-2 meters away
- Use medium speed — too strong a breeze can distort the shape
- Rotate the beret every 30 minutes for even drying
- Total drying time: 2-4 hours depending on material thickness
Fan-assisted air drying is the method recommended by most uniformed groups because it introduces no heat risk. The PCSS NPCC uniform maintenance guide suggests leaving the folded beret under a weight while it dries — combining the shaping and drying steps into one process. This method takes longer but produces the most consistent results.
Avoiding direct sunlight and heat sources
- Direct sunlight can fade the beret color and stiffen the fabric
- Radiators and heaters cause uneven drying and shrinkage
- Microwave and oven are never acceptable — they will melt synthetic linings
- The leather band (if present) is especially vulnerable to heat damage
Pat dry with a towel before shaping — this removes excess moisture and cuts drying time by roughly 30%. Do not wring or twist the beret, as this distorts the fiber alignment and creates permanent wrinkles. Shape the beret while it is still damp and allow it to air dry naturally.
How long to soak a beret?
Soaking time is a function of material thickness, desired stiffness, and the method you are using. The standard advice across military and uniformed groups is 10-15 minutes, but the actual time depends on several variables.
Standard soak time (10-15 minutes)
- 10-15 minutes is typical for standard wool berets (USS NPCC uniform guidance)
- The beret should be fully submerged — weigh it down with a plate if needed
- Remove the beret when the water runs clear (no dye bleeding)
- Gently squeeze out excess water — do not wring
The 10-15 minute window is based on the time needed for water to fully penetrate wool fibers without saturating the inner lining. Most military berets use a dense wool felt that absorbs water slowly — anything less than 8 minutes and the core of the fabric may remain dry, leading to uneven shaping.
Factors affecting soak time
- Thicker or stiffer berets (e.g., heavy wool felt) may need up to 20 minutes
- Thinner cotton or acrylic berets need only 5-8 minutes
- Water temperature affects absorption rate: cold water is slower but safer
- Pre-wetted berets (from a previous seasoning) need less time
The material thickness is the dominant factor. A standard NPCC beret made of wool-polyester blend typically reaches full saturation at 12 minutes. A thicker SAF beret in pure wool felt may need 18-20 minutes. The NPCC Beret tutorial recommends checking the beret periodically — when the fabric feels uniformly damp and the water runs clear, the soak is complete.
Signs of over-soaking
- Water becomes deeply colored with dye (excessive bleeding)
- Fabric feels waterlogged and heavy — takes more than 6 hours to dry
- Shape does not hold after drying (fibers are too relaxed)
- Leather band (if present) becomes stiff or warped
Over-soaking can cause material distortion. Wool fibers that remain saturated for too long lose their natural crimp, making the beret limp and shapeless even after drying. If the water turns dark with dye after 15 minutes, remove the beret immediately — the dye loss indicates the fabric is being over-extracted.
Is there a wrong way to wear a beret?
Yes — and the mistakes are so common that uniformed organizations spend significant training time correcting them. The wrong placement can make a seasoned beret look like an unseasoned one, and it can draw unwanted attention during inspection.
Correct placement: crest above left eye
- The crest or badge must sit directly above the left eye (Westwood NPCC uniform etiquette)
- The beret should be level — not tilted forward, backward, or to the side
- Excess material should be folded to the right, away from the crest
- The leather band should sit just above the eyebrows, not on them
According to the Military History HQ guide, the damp beret should be placed on the head with the badge area above the left eye, and excess material pulled down and to the right toward the right ear. This creates the characteristic angled silhouette that signals a properly seasoned beret.
Common mistakes
- Wearing the crest too low or off-center — the most frequent error
- Tilting the beret too far back, exposing the forehead
- Pulling the beret too low on the forehead, covering the eyebrows
- Sagging shape — the fabric droops because the crease was not set properly
- Wearing the beret without seasoning it first (flat, baggy look)
The PCSS NPCC uniform maintenance guide emphasizes that the beret must be seasoned to maintain its shape. An unseasoned beret will sag and lose its form within minutes of wear. The guide specifically notes that the crest should be on the rightmost side during the folding process, ensuring it sits correctly when worn.
Regulation vs casual wear differences
- Military and NPCC regulation: crest above left eye, firm shape, no tilt
- Scout regulation: similar placement but allows slightly looser fit
- St John regulation: crest centered over the left eye, minimal excess fabric
- Casual fashion wear: beret can be worn tilted, pushed back, or loose
The key difference between regulation and casual wear is the tolerance for shape. In uniform contexts, the beret must maintain a crisp, consistent silhouette. Casual wear allows the beret to sit looser and at different angles, but the basic principle — crest above the left eye, excess to the right — remains the same for most styles.
What season are berets worn?
Berets are worn year-round in uniform contexts, but the material choice changes with the season. The same beret that works perfectly in winter can become uncomfortable in summer, and vice versa.
Winter berets: wool and heavier fabrics
- Wool berets provide natural insulation and warmth in cold weather
- Thicker felted wool blocks wind better than lighter fabrics
- Wool also wicks moisture, preventing sweat buildup during physical activity
- Standard military berets (NPCC, SAF) are usually wool or wool-blend for year-round use
Wool berets are warm and suited for cold months. The dense felt construction traps body heat while allowing some breathability. For outdoor parades and training in winter, a wool beret is the standard choice across most uniformed organizations.
Summer berets: cotton and lightweight blends
- Cotton berets allow breathability and reduce heat buildup in warm weather
- Lightweight acrylic blends are common in summer uniform variants
- Summer berets often have a mesh lining or perforated band for ventilation
- Cotton berets need less seasoning time — 5-8 minutes soak vs 10-15 for wool
Cotton berets allow breathability in summer. Some organizations issue two berets — one wool for winter, one cotton for summer — while others use a single wool-blend beret year-round. The USS NPCC uniform guidance does not specify a seasonal variant, implying that the standard beret is expected to be worn in all seasons.
Year-round wear in uniform contexts
- Military and uniformed organizations wear berets in all seasons, regardless of weather
- NPCC, SAF, Scouts, and St John all mandate beret wear for formal occasions year-round
- Material choice is standardized within each organization, not seasonal
- Proper seasoning helps the beret maintain shape even in hot, humid conditions
The pattern is clear: for uniformed organizations, the beret is a year-round garment. The material is chosen for durability and appearance, not seasonal comfort. For fashion wearers, the choice is simpler — wool in winter, cotton in summer — but the seasoning principles remain the same.
Step-by-step: How to season a beret
This section brings together all the methods into a single, repeatable process. Follow these steps in order for the best results across all beret types and organizational standards.
- Step 1: Prepare the beret
- Remove the crest or badge — never season with the crest attached (The NPCC Beret)
- Wipe the inside of the beret with a damp towel to remove sweat and dirt
- Locate the two holes where the crest sits — this area is usually backed by cardboard
- Check the care label for material composition and washing instructions
- Step 2: Soak the beret
- Fill a basin with cold water (room temperature) — enough to fully submerge the beret
- Submerge the beret for 10-15 minutes (USS NPCC uniform guidance)
- Gently squeeze the beret underwater to ensure even saturation
- Avoid soaking the leather band — it can shrink and warp
- Remove the beret when the water runs clear
- Step 3: Shape the beret
- Pat the beret dry with a towel — do not wring or twist
- Place the damp beret on your head with the crest area above the left eye (Westwood NPCC uniform etiquette)
- Pull excess material down and to the right toward the right ear
- Wear the beret for 15-20 minutes to set the initial shape
- Alternatively, mold the beret over a rounded form (bowl, mannequin head)
- Step 4: Fold and weight the beret
- Remove the beret from your head and flatten it on a table
- Fold it in half so the crest area sits on the rightmost side (PCSS NPCC uniform maintenance guide)
- Press the beret into a semicircle-like shape
- Place books or a weight on top of the beret to season it
- Centralize the beret in the middle of the stack so it does not fall over
- Leave the weight in place for 6-8 hours (overnight) or until completely dry
- Step 5: Dry and finish
- Remove the weight and check the shape — the crease should be defined and even
- If the beret is still damp, let it air dry naturally for 2-4 hours
- Reattach the crest once the beret is fully dry
- For a sharper crease, iron the beret on low heat with a damp towel — only after it is well seasoned
- Periodically remove the towel to check progress, and turn the beret to the other side
- Step 6: Maintain the shape
- Wear the beret regularly to reinforce the crease
- If the shape softens, repeat the wet-hands shaping method (no full soak needed)
- Store the beret flat or folded with the crease intact
- Avoid crushing the beret in a bag or pocket
The pattern: invest time upfront for a shape that lasts. Quick methods are fine for emergencies, but they won’t hold up to regular wear.
Confirmed facts and what remains unclear
Not everything about beret seasoning is settled. Some practices are backed by multiple sources, while others are based on tradition and anecdote.
Confirmed facts
- Soaking in cold water is recommended for wool berets (USS NPCC uniform guidance)
- Drying with high heat can shrink the beret (The NPCC Beret)
- Shape must be set while the beret is damp (Military History HQ)
- NPCC requires the crest to be removed before seasoning (The NPCC Beret)
- The crest sits above the left eye in military and uniformed wear (Westwood NPCC uniform etiquette)
What’s unclear
- Whether overnight soaking produces a better shape than quick dampening
- Optimal water temperature for hybrid wool-acrylic blends
- Long-term effects of frequent seasoning on beret durability
- Whether the weight-press method is superior to wearing the beret while drying
- The ideal number of seasoning cycles for a permanent shape
The implication: there’s room for experimentation. What works for one person may not work for another, so test and adjust.
Every day or 2 wear it and wet your hands, then use hands to shape it.
— Reddit user in r/NationalServiceSG, describing a daily maintenance routine for SAF berets
Season is done by three simple steps. Shape it, soak it and stack it.
— OCT Ammar Bin Abdul Rahman, in a SAFTI Facebook video demonstrating the NPCC beret seasoning process
First, moisten the beret slightly; this helps in shaping it. Next, mold it to fit your head snugly, then hang it up or press it down while it dries.
— Our Singapore Army, TikTok tutorial on military beret shaping
The three quotes above represent the spectrum of beret seasoning advice: from the minimal daily touch-up to the structured soak-and-weight method. The common thread is that moisture and pressure — applied consistently — are the only two variables that matter. Everything else is a trade-off between speed and permanence.
Related reading: The NPCC Beret · Uniform Maintenance
The same principle of heat and oil application used for seasoning a wok applies to shaping a beret, though the materials differ significantly.
Frequently asked questions
Can I use a steamer to season my beret?
Yes, but only on wool berets and with caution. Steam can help relax fibers for shaping, but it carries the same heat risk as hot water. Keep the steamer at least 15 cm away and use short bursts. Never steam the leather band. Steam is best for touch-ups, not initial seasoning.
How do I fix a wrinkled beret after drying?
Lightly dampen the wrinkled area with a spray bottle, then reshape it by hand. Place the beret under a weight until dry. For stubborn wrinkles, use a cool iron with a damp towel — but only if the beret is already well seasoned. The NPCC Beret tutorial recommends ironing only after the beret has been properly seasoned.
Do berets need to be seasoned more than once?
Yes, especially if the beret is new or has not been worn for a while. The initial seasoning creates the shape, but regular wear and occasional re-seasoning reinforce the crease. Most uniformed personnel re-season their beret every 2-3 months, or whenever the shape starts to soften.
How to store a seasoned beret to maintain shape?
Store the beret flat or folded with the crease intact. Some NPCC units recommend keeping the beret under a light weight between uses. Avoid hanging the beret, as gravity will pull the fabric out of shape. Store in a cool, dry place away from direct sunlight.
What tools do I need for beret seasoning?
Minimal tools are required: a basin of cold water, a towel, elastic bands or clips, and a weight (books work well). For the NPCC method, you also need a flat surface and a damp towel for ironing. No specialized equipment is necessary — the process is designed to be done with household items.
Can I season a beret without soaking it?
Yes — the wet-hands method is a dry alternative that uses minimal water. Rub damp hands over the beret surface, shape it on your head, and wear it until dry. This method is faster but produces a less permanent crease. It is best for maintenance between full seasonings.
How to season a synthetic beret (polyester)?
Synthetic berets require gentler treatment. Use cool water and reduce soak time to 5-8 minutes. Avoid heat entirely — no iron, no hairdryer, no hot water. Shape while damp and let air dry naturally. The PCSS NPCC uniform maintenance guide notes that synthetic blends hold a crease less well than wool, so more frequent touch-ups may be needed.
Why does my beret lose its shape after wearing?
This usually means the beret was not fully dried during seasoning, or the material is too thin to hold a permanent crease. Re-season the beret with a longer soak and a longer drying period under weight. For synthetic berets, the material may not be capable of holding a sharp crease — in that case, accept a softer shape and use the wet-hands method for occasional touch-ups.
For NPCC cadets and SAF personnel, the choice is clear: invest the time in a full cold-water soak and weight-press seasoning, and your beret will hold its shape through inspections, parades, and daily wear. For fashion wearers who only need a seasonal shape, the quick wet-hands method is practical and low-risk. Either way, the principles are the same — moisture, pressure, and patience are the only tools you really need.
More related posts
 Jakarta to Singapore Flight: Time, Distance, Price & Alternatives
 Eastern & Oriental Express Guide: Cost, Route, Dress Code
 Shai Gilgeous-Alexander: Stats, Height, Contract, Family
 DBS Multi-Currency Card Fees vs YouTrip vs Wise
 Valerie Lee Nai Yi: PAP Politician and Sembcorp Executive
 Medium.com: What It’s Used For, Free Access & 2026 Status
 What Is Global Warming? Science, Causes & the 2030 Timeline
 Time in India Now: Current Local Time, Time Zone, and Conversions
